


/https%3A%2F%2Fstorage.canalblog.com%2F95%2F39%2F185208%2F60633034_o.jpg)
/https%3A%2F%2Fstorage.canalblog.com%2F75%2F88%2F185208%2F15922941_o.jpg)
/https%3A%2F%2Fstorage.canalblog.com%2F47%2F16%2F185208%2F10203477_o.jpg)
/https%3A%2F%2Fstorage.canalblog.com%2F76%2F17%2F185208%2F12785494_o.gif)
/https%3A%2F%2Fstorage.canalblog.com%2F15%2F72%2F185208%2F60784633_o.jpg)
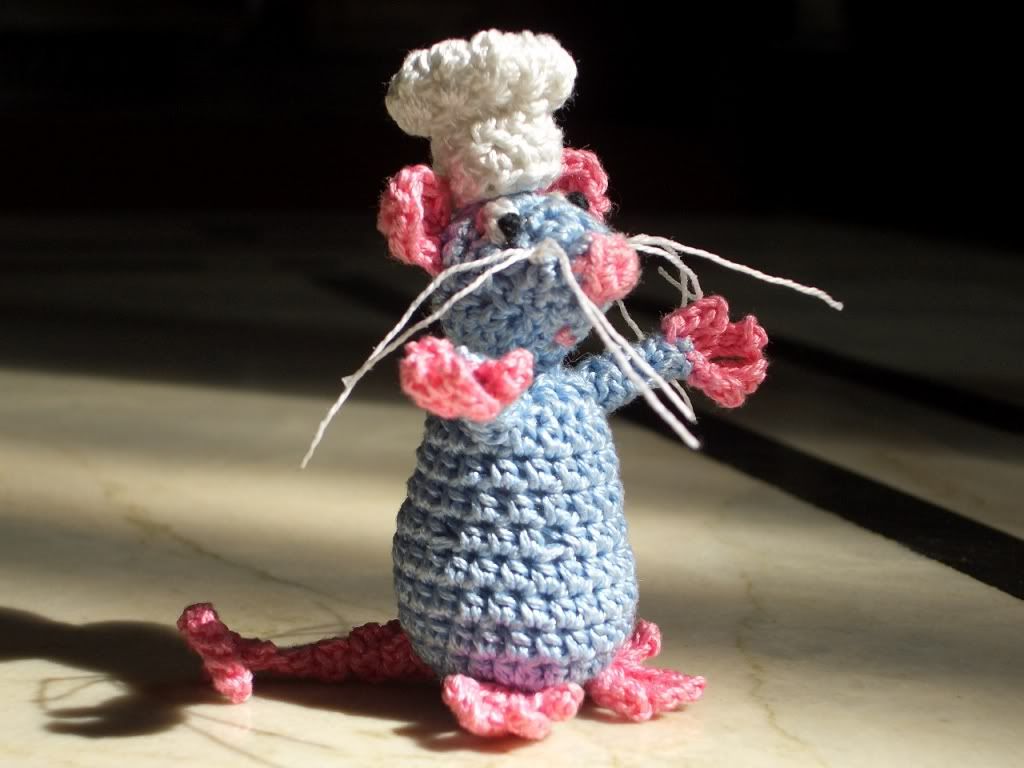
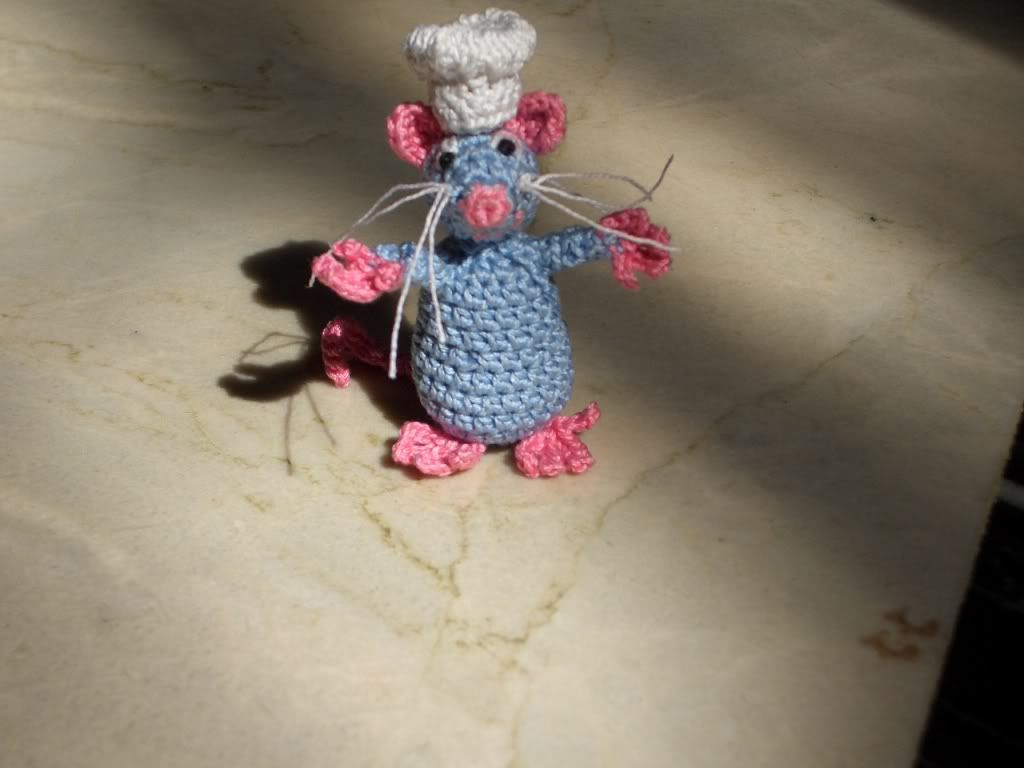
Ratatouille version amigurumi !
Trop gag ! Je viens de découvrir au fil de mon "surfage" comment réaliser Rémy de Ratatouille au crochet !
Voyez plutôt :
)
)

)
As usual, pls let me know what you guys think!
The pattern!
THE HAT :done in rounds
1. Make magic circle, 6 sc and pull to tighten.
2. 2 sc in each sc - 12 sc total
3. the poofy part is made by a puff stitch.. so 1 puff stitch in each stitch, 12 puff stitches total.
4. the body of the hat is done by 1 hdc in each puff stitch - 12 hdc total
5. repeat step 4. bind off. done!
If anyone needs clarification on what a puff stitch is, pls pm me and i'll explain in detail
THE BODY!:done in rounds as well
1. magic circle, 6 sc in circle pull to tighten
2. 2 hdc in each sc, 12 hdc total
3. 2 hdc in every alternate hdc, 18 hdc total
4. 2 hdc in every 3rd hdc, 24 hdc total
5. 1 hdc in each hdc, 24 hdc total
repeat step 5 twice more
round 8 : *1 hdc in the next 3 hdc, skip one stitch, repeat from * till end, 18 hdc total
9. 1 hdc in each hdc, 18 hdc total
repeat step 9 twice more
12. *2hdc in next 2 hdc, skip 1 stitch, repeat from *12 hdc total
13. 1 hdc in each hdc , 12 hdc total , fill with polyfill and shape accordingly
bind off leaving a 6 inch tail of thread.. for sewing to the head later!
THE
ARMS :you can either make them separately and sow them on, or attach
them to the body in the beginning itself. you just need to make a tube
of 6 hdc, 5 rows long, a cylindrical tube. so basically you start off
with step 1 of making the body and keep adding rows of hdc's till you
get a cylindrical tube of 5 rows. on the end of each row,
for fingers you attach the pink colored thread and
make
3 ch and sl stitch into each one (thumb) and then make 5 ch and slip
stitch into each one, make this twice (the two middle fingers) and then
3 ch again and slip stitch into each one and attach to the tube and
bind off.
it's simpler than it sounds trust me.. just a little fiddly
THE FEET: follow the same steps as for the fingers and attach to the bottom of the body leaving a gap of two stitches between the feet..you want them close together really
THE TAIL: make 20 ch, slip stitch in the first 5, sc in the next five, hdc in the next 5 ch and dc in the last 5 ch. bind off leaving a tail of thread so you can sow it to the body.. it attaches on the thicker bit.
THE HARD PART, THE HEAD! :
1.magic circle with the pink thread, 6 sc in the circle, pull to tighten. (nose)
2.switch to blue thread, 1 hdc in each sc, 6 hdc total
3.2 hdc in each hdc, 12 hdc total
4. 1 hdc in each, 12 hdc total
5. 2 hdc in ever alternate hdc, 18 hdc total
6. 1 hdc in each hdc, 18 total
7. repeat step 6
8. repeat step 6.
9. * 1 hdc in next 2 hdc, skip 1 hdc, repeat from * 12 hdc total at which point you should fill with polyfill
10.
*1 hdc in next hdc, skip 1 hdc repeat from * 6 hdc total, after which
you slip stitch into the opposite stitch to close up the teeny hole
just made 
THE EARS! : NOT done in rounds
1. 2 ch.
2. 2 sc in each ch, 4 sc total
3. 1 sc in each sc, 4 sc total
4. slip stitch down the side of the work done, bind off leaving a 3 inch tail for sowing to the head
stitch them onto the 6th row of the head, spaced about three to four stitches apart.
embroider the eyes or just stick googly eyes on em, knot on the whiskers with white thread, which i stiffened with white glue..
Done? done! whew.. i do not like writing down patterns! if anyone makes these, please let me see them! if anyone needs help, please pm me!
have fun!
C'est chez Craftster et merci à elle !
/https%3A%2F%2Fassets.over-blog.com%2Ft%2Fcedistic%2Fcamera.png)
/http%3A%2F%2Fstreetcolor.files.wordpress.com%2F2011%2F06%2Fimg_0090.jpg)
/https%3A%2F%2Fstorage.canalblog.com%2F40%2F69%2F185208%2F81971110_o.jpg)
/https%3A%2F%2Fstorage.canalblog.com%2F18%2F38%2F185208%2F81640279_o.jpg)